

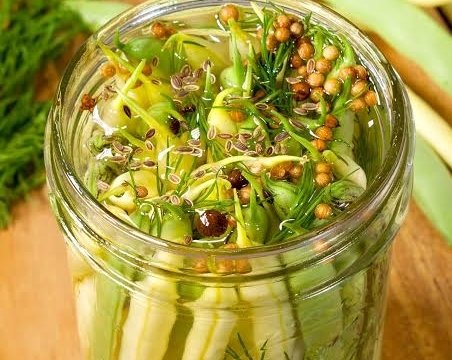
Capturing the essence of a sun-soaked garden harvest is one of life’s greatest simple pleasures, and this easy dilly beans recipe is the perfect introduction to home preservation. With just a few fresh ingredients, you can transform crisp green beans into vibrant, tangy pickles that celebrate the peak flavor of the season. 🌿🌻
Each jar is packed with a delicious harmony of aromatic dill, robust garlic, and just enough spice to make your taste buds dance with delight. These pickled treats are not only incredibly satisfying to make, but they also bring a beautiful, crunchy burst of garden-fresh taste to your table any time of year. 😋✨
Whether you are a seasoned canner looking to stock your pantry or a curious beginner eager to try water bath preservation for the first time, this step-by-step guide makes the entire process incredibly approachable. Let us dive in and learn how to seal up a little bit of sunshine in every single jar! 🍯
30 minutes
15 minutes
45 minutes
Makes 4 pint jars
Ingredients
- 2 pounds fresh, crisp green beans, washed and trimmed to fit pint jars (about 1/2 inch below the rim)
- 4 heads of fresh dill (or 4 teaspoons dill seeds)
- 4 large garlic cloves, peeled
- 2 teaspoons red pepper flakes (optional, for heat)
- 2 and 1/2 cups white vinegar (5% acidity)
- 2 and 1/2 cups water
- 1/4 cup pickling salt (or non-iodized kosher salt)
Shopping List
- Produce: 2 pounds fresh green beans, 1 bunch fresh dill (or dill heads), 1 bulb garlic
- Pantry: White vinegar (5% acidity), Pickling salt, Red pepper flakes
Equipment Needed
- Water bath canner with rack
- 4 pint-sized canning jars with lids and bands
- Jar lifter and canning funnel
- Large saucepan
- Measuring cups and spoons
- Bubble remover or small plastic spatula
- Clean kitchen towels
Helpful Tips
- Prioritize Snappiness: For the ultimate crunch, harvest or purchase your green beans on the very same day you plan to can them; any lingering limpness will yield soft, unappealing pickles after processing.
- Choose the Right Salt: Always opt for pure pickling or canning salt instead of standard table salt or iodized varieties, which contain anti-caking agents that can turn your brine cloudy and leave a powdery sediment at the bottom of the jars.
- Spice Adjustments: Feel free to customize the heat to your liking by adjusting the red pepper flakes, or introduce a unique depth of flavor by tossing in a few black peppercorns or mustard seeds to each jar.
- Patience Pays Off: Although it is tempting to pop open a jar immediately, letting your finished dilly beans cure in a cool, dark pantry for 3 to 4 weeks allows the pickling liquid to fully penetrate and mature the flavors.
Step-by-Step Instructions
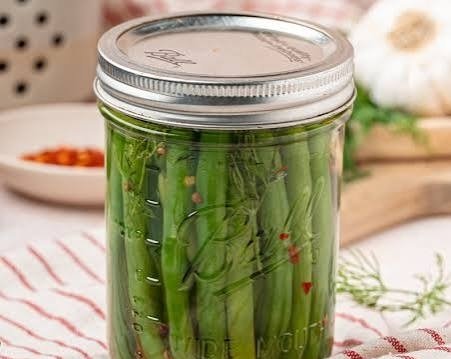
- Prepare your water bath canner, jars, and lids by washing them in warm, soapy water and keeping the jars hot in the canner water until ready to use.
- In a large saucepan, combine the white vinegar, water, and pickling salt. Bring the mixture to a boil over medium-high heat, stirring until the salt completely dissolves, then reduce heat to keep warm.
- In the bottom of each hot, sterilized pint jar, place 1 peeled garlic clove, 1 head of fresh dill (or 1 teaspoon dill seeds), and 1/2 teaspoon of red pepper flakes.
- Pack the trimmed green beans tightly into the jars vertically, leaving about 1/2 inch of headspace at the top of the jar.
- Carefully pour the hot vinegar brine over the green beans in each jar, maintaining the 1/2 inch headspace and ensuring the beans are fully submerged.
- Run a bubble remover or plastic spatula down the inside of each jar to release any trapped air bubbles, adjusting the brine level if necessary.
- Wipe the rims of the jars with a clean, damp cloth, center the lids on the jars, and screw the bands on until they are just fingertip tight.
- Place the jars into the boiling water bath canner, ensuring they are covered by at least 1 to 2 inches of water, and process for 10 minutes (adjusting for altitude if necessary).
- Carefully remove the jars using a jar lifter and place them on a towel-lined countertop to cool undisturbed for 24 hours before checking the seals.
Variations & Serving Ideas
Serve these zesty dilly beans chilled directly from the fridge to maximize their satisfying crunch. They serve as a brilliant addition to gourmet charcuterie boards alongside creamy cheeses and cured meats, make a show-stopping garnish for a weekend brunch Bloody Mary, or can be chopped up to add a bright pop of acidity to potato salad. Once opened, keep the jar sealed tightly in your refrigerator and enjoy within 4 weeks.
We cannot wait to hear how your home preservation journey turns out! Please leave us a comment below and share your favorite ways to enjoy these pickled green beans.