

There is nothing more satisfying than hearing that distinct “pop” of a freshly sealed jar, knowing you have preserved the very best flavors of the season. Crafting your own homemade pickles is a beautiful way to bring garden-fresh crispness to your pantry, ensuring a delicious bite is always within reach. Whether you are completely new to water bath canning or looking to perfect your family recipe, this guide will help you bloom into a confident home preserver. 🌿
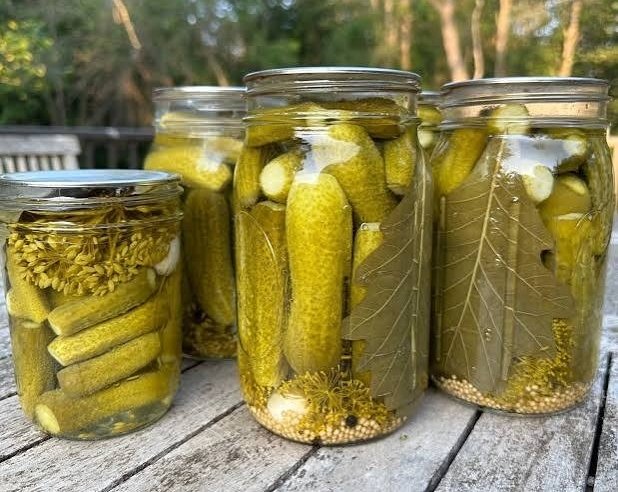
Imagine the bright, garlicky aroma filling your kitchen as you pour the hot, seasoned brine over fresh cucumber spears. These pickles capture a perfectly balanced, deli-style tang that easily outperforms any store-bought jar, completely free of artificial additives or dyes. They are bound to become the star of your backyard gatherings, elevating everything from classic burgers to festive holiday platters. 🥒✨
In this comprehensive tutorial, we will walk you through every single step to guarantee ultimate crunch and safe preservation. Get your canning tools ready, gather your fresh ingredients, and let us transform simple cucumbers into vibrant jars of pure satisfaction. Let’s get preserving! 🧺
30 minutes
15 minutes
45 minutes
Makes 6 pint jars
Ingredients
- 3 to 4 lbs of fresh pickling cucumbers (such as Kirby), washed and sliced
- 3 cups water
- 3 cups white vinegar (5% acidity)
- 1/4 cup pickling salt (or non-iodized kosher salt)
- 6 fresh dill sprigs (or 6 teaspoons dill seeds)
- 6 garlic cloves, peeled
- 3 teaspoons mustard seeds
- 1.5 teaspoons black peppercorns
- 1.5 teaspoons red pepper flakes (optional, for heat)
Shopping List
- Produce: 3 to 4 lbs pickling cucumbers, 1 bunch fresh dill, 1 head of garlic
- Pantry: 1 bottle white vinegar (5% acidity), 1 box pickling salt, 1 jar mustard seeds, 1 jar black peppercorns, 1 jar red pepper flakes
Equipment Needed
- Water bath canner or a very large stockpot with a rack
- 6 glass pint canning jars with lids and bands
- Jar lifter and canning funnel
- Bubble remover tool or clean plastic spatula
- Medium saucepan for brine
- Measuring cups and spoons
- Sharp chef’s knife and cutting board
Helpful Tips
- Choose the right cucumbers: Seek out small, bumpy pickling cucumbers like Kirby and process them within 24 hours of harvest to guarantee an exceptionally crisp and crunch-heavy bite.
- Use pure salt: Always opt for canning or pickling salt; regular table salt contains anti-caking agents that will cloud your beautiful brine, while iodized salt can darken the pickles.
- The blossom end secret: Always slice off at least 1/16th of an inch from the blossom end of each cucumber, as this end contains enzymes that can make your finished pickles soft and mushy.
- Incorporate natural tannins: Adding a clean grape leaf, oak leaf, or a pinch of black tea leaves to each jar releases natural tannins that help keep the cucumber skin remarkably firm during processing.
- Patience pays off: While it is tempting to open a jar immediately, let your pickles cure in a cool, dark pantry for 3 to 4 weeks so the dill, garlic, and vinegar can fully mature and blend.
Step-by-Step Instructions
- Wash and sanitize your pint jars, lids, and bands. Keep the jars warm in your water bath canner filled with hot water.
- Wash the cucumbers thoroughly and slice off 1/16th of an inch from the blossom end to prevent soggy pickles.
- Cut the cucumbers into spears or chips, or leave small ones whole.
- In a medium saucepan, combine the water, white vinegar, and pickling salt. Bring to a boil, stirring until the salt is fully dissolved, then keep hot.
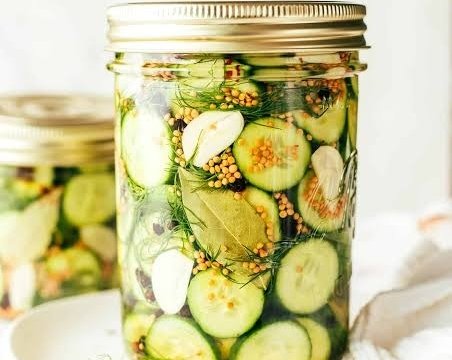
- Into each warm pint jar, place 1 garlic clove, 1 sprig of dill, 1/2 tsp mustard seeds, 1/4 tsp peppercorns, and a pinch of red pepper flakes.
- Pack the cucumber spears tightly into the jars, leaving a 1/2-inch headspace at the top.
- Carefully pour the hot vinegar brine over the cucumbers, maintaining the 1/2-inch headspace.
- Run a bubble remover or plastic spatula down the inside walls of the jars to release any trapped air bubbles.
- Wipe the rims clean with a damp paper towel, center the lids on the jars, and screw the bands on until fingertip-tight.
- Place the jars into the water bath canner, making sure they are covered by at least 1 inch of water.
- Bring the water to a rolling boil and process the jars for 10 minutes, adjusting for altitude if necessary.
- Using a jar lifter, remove the jars and place them on a towel-lined countertop. Let them cool undisturbed for 24 hours to seal.
Variations & Serving Ideas
These vibrant dill pickles are the ultimate companion for smoky barbecued meats, gourmet grilled cheese sandwiches, and loaded deli burgers. They also add a wonderful pop of acidity and color to a curated charcuterie board alongside sharp cheeses and cured meats. For the best taste experience, chill the jar thoroughly before serving. Once a jar is opened, store it in the refrigerator and enjoy within 2 months, while unopened jars will remain perfectly delicious in your pantry for up to a year.
We hope this simple canning recipe inspires you to start your own preserving traditions and fill your shelves with homemade love. We would absolutely love to hear how your batch of pickles turned out, so please leave a comment and share your thoughts below!